
All About Growing Potatoes
|
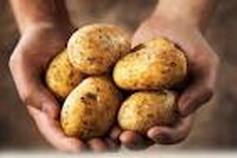
Potatoes vary in size, shape, color, texture and time to maturity. Maturation time is the most important variable, because potato tubers grow best when soil temperatures range between 60 and 70 degrees Fahrenheit. Try to get your crop harvested before hot summer temperatures arrive
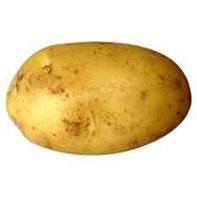
Types to Try Early varieties that mature in less than 90 days are good fits for any garden. Creamy, round ‘Irish Cobbler,’ purple-skinned ‘Caribe,’ and prolific ‘Red Norland’ fall into this group, along with ‘King Harry,’ which is resistant to Colorado potato beetles. |
Midseason varieties mature in 100 days or so, and include ‘Yukon Gold’ and ‘Red LaSoda,’ which is often the top-producing potato in warm climates.
Late varieties need 110 days or more of growing time, but they typically produce a heavy set of tubers that keep well in storage. ‘Butte’ is an all-purpose brown-skinned potato that performs well when grown in the Midwest; ‘Katahdin’ and ‘Kennebec’ rule in the Northeast.
Elongated fingerling potatoes vary in their maturation times and come in a range of colors and sizes. None are very early, but late-maturing fingerlings will size up earlier if you presprout the seed potatoes before you plant them.
When to Plant
In climates with short springs and hot summers, plant the early and midseason varieties three to four weeks before your last spring frost date.
In climates with long springs and hot summers, plant early and midseason varieties three to four weeks before your last spring frost date; plant late-maturing varieties in early summer so they will mature in the cooler fall.
In climates with cool summers, plant early, midseason and late varieties two to three weeks before your last spring frost date.
How to Plant
Prepare the planting bed by loosening the soil to at least 10 inches deep. Potatoes adapt well to acidic soils with a pH below 6.0, which is lower than what is preferred by many other vegetable crops. Thoroughly mix in a layer of compost or rotted leaves, along with a half-ration of alfalfa meal, soybean meal or another high-nitrogen organic fertilizer (follow label directions). Do not use manure because it is correlated with an increase in rough patches on spud skins.
|
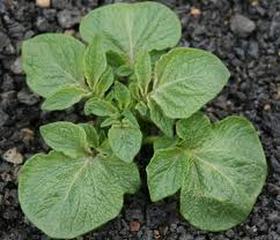
Two days before planting, cut the seed potatoes into pieces, so that each piece has two to three buds (or “eyes”). Cutting the seed potatoes and letting the cut pieces dry for about two days reduces the risk of rotting. Work carefully if the eyes have already grown into sprouts. Allow the cut pieces to dry in a well-ventilated room. Plant the pieces 12 inches apart in 4-inch deep furrows; cover the seed pieces with 2 inches of soil. Fill in the furrows after the first sprouts emerge
Harvesting and Storage Potato plants die back as they finish making their crop. Begin digging when the foliage starts to yellow and wither. Gently knock off dirt and allow the tubers to dry indoors, covered with dry towels, for a day or two. Take care to protect the tubers from sunlight at all times to prevent |
|
greening that may result in bitterness. Store the most perfect tubers in a cool, 50- to 60- degree place to be used as seed potatoes. Eat the “less than perfect” potatoes first, but keep in mind that they won’t store forever. For longer storage, potato slices can be blanched and dried. A pressure canner must be used to can potatoes.
Saving Seeds
Occasionally potatoes produce true seeds, but they are easiest to propagate by replanting the actual potatoes. If you are a new gardener, start with certified disease-free seed potatoes. Resist the urge to eat several pounds of perfect, medium-sized potatoes — they will be great for planting the following year. Most experienced gardeners experiment with varieties and eventually assemble a collection of favorites. About 6 pounds of seed potatoes are needed to plant 50 feet of row — yield will vary from 75 to 125 pounds.
|
Growing Tips
Buy interesting-looking potatoes if you see them in stores. If you love the way they taste, save a couple and use them as seed potatoes in the spring. In rural areas, farm supply stores sell seed potatoes of varieties known to produce well under local conditions. Get an earlier crop by presprouting your seed potatoes indoors. Presprouted seed pieces will mature up to a month ahead of seed pieces bearing dormant eyes. Five weeks or so before planting, spread out your seed potatoes in a single layer in a warm, well-lit room, and wait for them to sprout from the eyes. Presprouted potatoes are fragile, so be careful when handling them. Large sprouts that break off of the parent potato often will grow when planted in moist soil. |
Fertilize in halves, with half of the fertilizer mixed into the soil before planting, and the rest used if needed as a side dressing when the plants are 12 inches tall, just before piling on mulch or hilling up soil around stems (to prevent sunburned spuds). See “How to Plant," above.
Use old blankets to protect newly emerged potatoes if late frosts are forecast. Once the blankets are removed, the stems will pop back up within a day. (If nipped back by frost, potatoes will re-grow from secondary buds.)
Mulch plants heavily with weathered leaves or straw to keep the soil moist and protect tubers from sunlight. In slug-prone seasons, hill up loose soil over the bases of the plants instead of mulching.
After harvesting the potatoes in the early stages of summer, plant the vacated space with beans or squash, or with a cover crop of buckwheat.
By Barbara Pleasant
Mother Earth News December 2008/January 2009